Why Is My Dryer Taking So Long? 9 Causes and Safe Fixes
Why is my dryer taking so long to dry clothes? The usual cause is restricted airflow: a loaded lint screen, crushed transition duct, blocked exterior vent, or an oversized load prevents warm, moist air from escaping. Other possibilities include clothes leaving the washer too wet, the wrong cycle, a dirty moisture sensor, inadequate power or gas, and a heating-system fault.
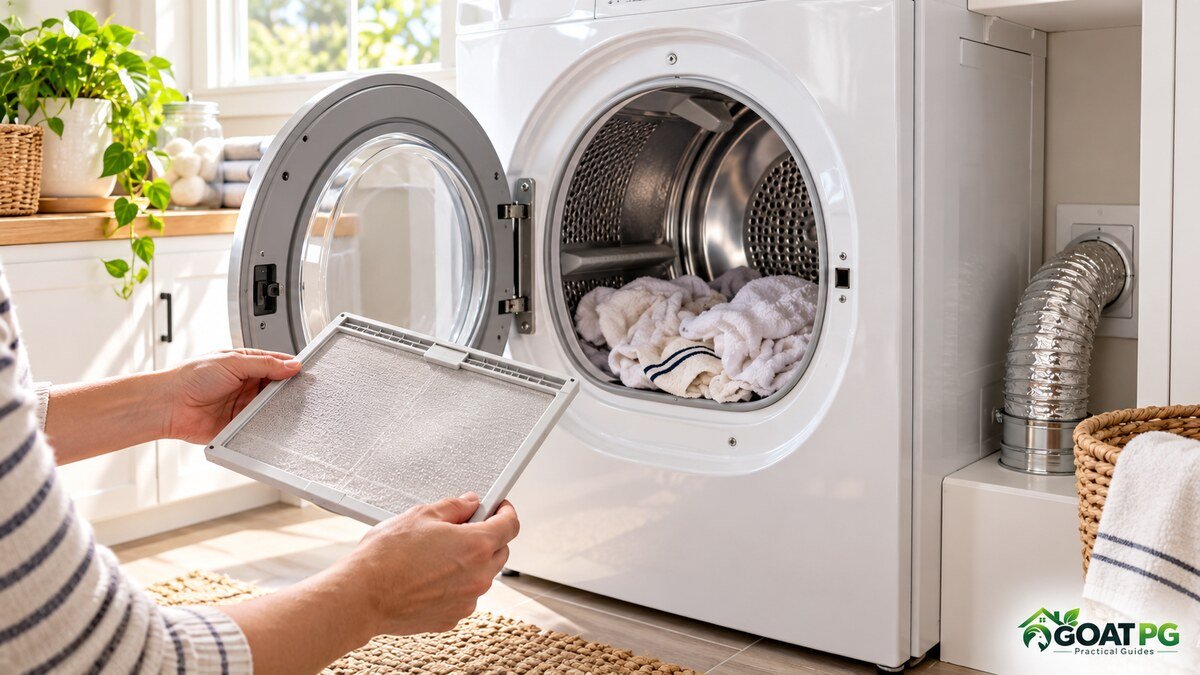
A healthy dryer should move a strong stream of warm, humid air outdoors. When that pathway narrows, drying time rises, the machine works harder, and lint can build up in places you cannot see. This guide starts with the checks a homeowner can safely perform and explains when to stop and call a qualified technician.
In this guide
Quick answer: check these four things first
- Clean the lint screen. Remove lint before every load, even when the screen looks only partly covered.
- Reduce the load. A drum packed tightly cannot tumble clothes through moving air.
- Inspect the vent path. Look behind the dryer for a crushed or sharply kinked transition duct, then confirm that the outdoor flap opens while the dryer runs.
- Check the washer’s spin. Clothes should be damp, not dripping, when they enter the dryer.
If the dryer smells hot or burnt, the cabinet becomes unusually hot, the plug or outlet feels hot, you see sparks, or a gas dryer smells like gas, stop the cycle. Turn the appliance off, avoid disassembling it, and arrange professional help. If you smell gas, leave the area and follow your utility provider’s emergency instructions.
9 reasons a dryer takes too long
1. The lint screen is restricting airflow
The lint screen is the easiest place to start. A visible layer of lint reduces airflow, but an apparently clean screen can also collect an invisible film from dryer sheets or fabric products. Wash a removable screen only if the manufacturer permits it, using mild dish soap, warm water, and a soft brush. Rinse it thoroughly and let it dry completely before reinstalling it.
Never run the dryer without its lint screen. Loose lint can enter the duct and appliance cabinet, creating a maintenance and safety problem.
2. The load is too large or poorly mixed
Clothes dry when they tumble through heated moving air. An overloaded drum leaves little room for tumbling and traps damp items in a dense bundle. A very small load can also confuse some automatic moisture cycles because items may not contact the sensor consistently.
Dry heavy towels, jeans, and bedding separately from lightweight shirts. Untangle sheets and duvet covers before loading so smaller items do not become trapped inside them. If towels develop an odor even after laundering, see our guide to why towels smell after washing.
3. The transition duct is crushed or kinked
The short duct between the dryer and wall can become flattened when the appliance is pushed back. Flexible material may also sag or form tight bends that collect lint. With the dryer off and cool, look behind it without straining the gas line or power cord. The duct should follow the manufacturer’s installation instructions and should not be compressed.
Do not substitute plastic or thin foil material when local codes or the dryer manual require an approved metal duct. Installation requirements vary, so use the appliance instructions and local rules as your standard.
4. The exterior vent hood is blocked
Lint, leaves, nesting material, snow, or a stuck damper can block the outdoor outlet. While the dryer runs, the flap should open and you should feel steady airflow from a safe position. Weak airflow after cleaning the lint screen suggests a restriction somewhere between the dryer and outdoors.
Do not reach deeply into ductwork or climb to a difficult roof outlet. Long, concealed, damaged, or inaccessible vent systems are jobs for a qualified vent-cleaning professional.
5. Clothes are entering the dryer too wet
A washer that does not spin at full speed leaves extra water for the dryer to remove. Check whether you selected a low-spin or delicate setting, whether the load became unbalanced, and whether the washer displayed an error. Redistribute the load and run a drain-and-spin cycle if the fabric care labels allow it.
Persistent draining or spinning problems need washer troubleshooting. A washer that holds stagnant water can also contribute to odors; our guide explains why a washing machine smells and how to clean the common odor zones.
6. The selected cycle does not match the load
Air-dry, delicate, eco, and low-heat cycles intentionally use less heat or more time. Automatic cycles may end early when mixed fabrics dry unevenly, while a timed cycle may run without responding to remaining moisture. Check the garment labels and choose a setting appropriate for the heaviest items in the load.
More heat is not always better. High heat can damage elastic, shrink fabric, and bake in some stains. Use the lowest effective temperature allowed by the care label.
7. The moisture sensor is coated
Many dryers use metal sensor bars inside the drum to estimate when clothes are dry. Residue from fabric products can reduce reliable contact. With the dryer unplugged and cool, locate the sensors using the owner’s manual and wipe them as directed by the manufacturer. A soft cloth and mild cleaner may be recommended, but avoid abrasive pads that could damage the surface.
8. The dryer is not receiving the heat or power it needs
An electric dryer can sometimes tumble even when part of its electrical supply is interrupted, leaving little or no heat. A gas dryer may tumble when ignition or gas supply is faulty. Check the household electrical panel only in the normal way described in the manual; do not remove appliance panels or work on wiring or gas components.
If the drum turns but the air stays cold on a heat cycle, or the heat cuts in and out abnormally, a qualified appliance technician should test the heating element, igniter, thermal devices, controls, and electrical supply.
9. An internal component is worn or blocked
A failing blower wheel, thermostat, belt system, motor, or control can reduce airflow or heat. Internal lint can also accumulate beyond the areas meant for routine homeowner cleaning. Warning signs include grinding or squealing sounds, a drum that turns slowly, repeated overheating, a burning smell, tripped breakers, or cycles that stop unexpectedly.
Internal diagnosis requires the correct tools and model-specific procedures. Do not bypass a thermal fuse or other safety device to keep the dryer running.
A safe step-by-step diagnostic routine
- Read the manual. Confirm the recommended load size, vent type, cycle, and cleaning method for your model.
- Clean the lint screen. Reinstall it only when fully dry.
- Run a smaller test load. Use several similar items rather than one bulky piece or an overfilled drum.
- Confirm the washer’s spin result. If garments are dripping, address the washer first.
- Check the cycle. Choose a normal sensor cycle appropriate for the fabric.
- Inspect behind the dryer. With the appliance off, look for obvious crushing or kinking without disturbing connections.
- Observe the outdoor outlet. Confirm that the damper opens and airflow is strong while the dryer operates.
- Compare time and heat. Note whether the dryer heats normally, whether the load tumbles freely, and whether the cycle ends too soon.
- Stop if symptoms are unsafe. Excessive heat, burning odor, sparks, gas odor, or repeated breaker trips require professional attention.
Change one variable at a time. That makes it easier to tell whether load size, washer spin, cycle selection, or airflow caused the delay.
Dryer vent and fire safety
The U.S. Fire Administration says failure to clean was the leading factor contributing to ignition in home clothes-dryer fires reported from 2018–2020. Its guidance emphasizes cleaning the lint filter and maintaining the dryer vent system. Review the agency’s official appliance and electrical fire-safety guidance.
- Clean the lint screen before or after every load.
- Keep the area around the dryer free of boxes, paper, cleaning rags, and other combustible clutter.
- Use an approved vent system installed according to the manual and local requirements.
- Do not run the dryer when you are sleeping or away from home.
- Never dry items contaminated with gasoline, paint thinner, cooking oil, or other flammable substances unless the product and appliance instructions explicitly establish a safe method.
- Have inaccessible or heavily restricted ducts professionally inspected and cleaned.
When should you call a technician?
Arrange service when simple external checks do not restore normal drying, especially if the dryer has no heat, overheats, stops mid-cycle, trips a breaker repeatedly, produces unusual sounds, or shows an error code. Gas odor, sparking, smoke, and burning smells are urgent stop-use conditions.
You may also need a vent professional when the outlet is on a roof, the duct is long or concealed, airflow remains weak, lint returns quickly, or the duct is damaged. A technician can measure airflow and temperature, inspect internal components, and verify that safety controls operate correctly.
How to keep drying times short
- Clean the lint screen every load.
- Use the washer’s appropriate high-spin option for sturdy fabrics.
- Separate lightweight items from towels, denim, and bulky bedding.
- Leave enough drum space for clothes to tumble.
- Untangle sheets before and during the cycle if necessary.
- Inspect the visible transition duct periodically for crushing or damage.
- Check the outdoor vent for free movement and obvious blockage.
- Follow the manufacturer’s schedule for vent and appliance maintenance.
- Remove dry clothes promptly so retained moisture does not create a stale odor.
If clean laundry develops an acidic or stale smell, drying delay may be only part of the problem. The related guide why clothes smell sour after washing covers detergent residue, overloading, delayed drying, and washer hygiene.
Frequently asked questions
Why does my dryer need two cycles?
Needing two cycles usually points to restricted airflow, an oversized or mixed load, clothes entering too wet, or a heat problem. Start with the lint screen, load size, washer spin, transition duct, and outdoor vent. If airflow is strong but the dryer does not heat normally, schedule service.
Can a clogged vent make clothes stay damp?
Yes. A dryer must exhaust moist air. A restriction keeps humidity in the drum, increases cycle time, and may make the appliance unusually hot. Stop using the dryer if overheating or a burning smell appears.
Why is the dryer hot but the clothes are still wet?
Heat without adequate airflow cannot remove moisture efficiently. Check for a loaded lint screen, crushed transition duct, blocked outlet, overfilled drum, or items balled inside sheets. Internal blower or control problems require a technician.
How long should a dryer take?
Drying time varies with dryer design, fabric weight, load size, washer spin speed, selected temperature, room conditions, and vent length. Compare similar loads on the same setting rather than relying on one universal time. A sudden, repeatable increase is more useful as a warning sign.
Does adding more heat solve slow drying?
Not when airflow is restricted or the load cannot tumble. Higher heat can damage fabric and may worsen an unsafe overheating condition. Correct the airflow, load, washer spin, or component problem instead.
Bottom line
If you are asking, “Why is my dryer taking so long to dry clothes?” begin with airflow and load conditions. Clean the lint screen, reduce and sort the load, make sure the washer spins out enough water, inspect the visible duct, and verify strong outdoor exhaust. When the dryer has no heat, overheats, smells burnt, trips a breaker, or still performs poorly after those checks, stop guessing and have the appliance and vent system inspected by qualified professionals.