
How to Clean a Dryer Vent Safely: 8 Easy Steps
Learning how to clean a dryer vent safely can shorten drying times, lower wasted energy, and reduce a preventable fire risk. A lint screen catches plenty of fibers, but it does not catch everything. Fine lint moves into the exhaust duct, where it slowly restricts airflow.
If you are learning how to clean a dryer vent, start with a careful annual cleaning as a sensible baseline for most homes. Clean sooner if loads suddenly take longer, the laundry room feels unusually warm, or the outside vent flap barely opens. This guide explains the complete job without shortcuts that can damage the vent or push lint deeper into the line.
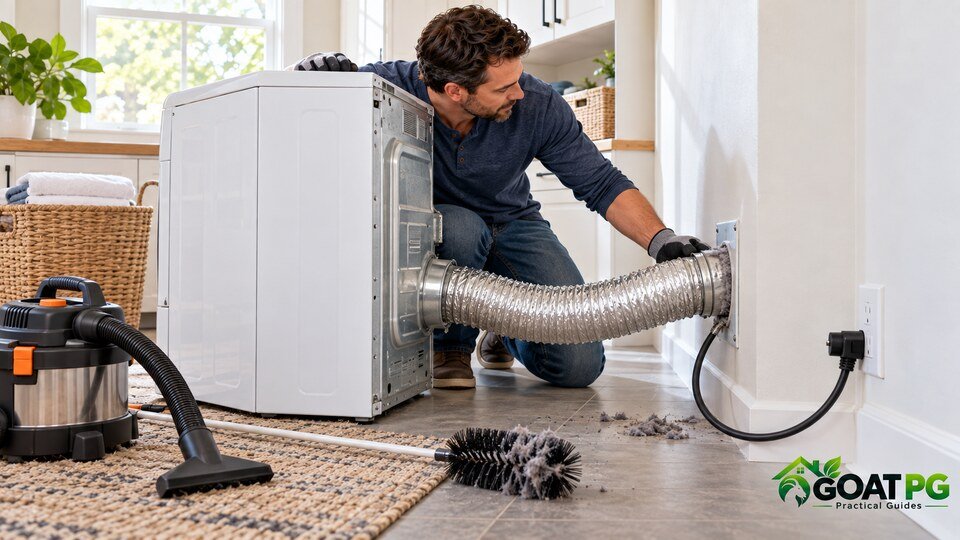
Quick answer: How often should you clean a dryer vent?
The steps below explain how to clean a dryer vent without risky shortcuts. Clean the lint screen before or after every load and inspect the exhaust path regularly. The U.S. Fire Administration recommends cleaning dryer vent ductwork every year. A large household, frequent laundry, pets, a long duct, or several duct bends may make more frequent cleaning necessary.
Do not wait for a complete blockage. Restricted airflow can make a dryer run longer and hotter. If your machine already needs two cycles, also read our guide to why a dryer takes so long; the vent is common, but it is not the only possible cause.
Table of Contents
7 warning signs your dryer vent needs cleaning
Before deciding how to clean a dryer vent, check the symptoms. A calendar reminder is useful, but your dryer may show trouble before the scheduled cleaning. Stop and inspect the system if you notice several of these signs:
- Clothes need more than one cycle. Moist air cannot leave efficiently, so fabrics stay damp even though the drum is hot.
- The dryer or laundry room feels unusually hot. Heat that should travel outside remains around the appliance.
- There is a hot or burnt-lint smell. Turn the dryer off immediately. Do not run it again until the cause is found.
- Lint collects behind or beneath the dryer. A loose connection, crushed duct, or leaking seam may be releasing fibers.
- The outside vent flap opens weakly. With the dryer running, it should open and release a noticeable stream of warm air.
- The lint screen fills faster than usual. Rapid buildup can accompany poor exhaust flow.
- The dryer shuts off mid-cycle. Some machines stop when internal temperatures become excessive.
A slow dryer is more than an inconvenience. According to the U.S. Fire Administration, failure to clean was the leading factor contributing to ignition in home clothes-dryer fires reported from 2018–2020. That is a strong reason to treat a blocked vent as a maintenance issue, not simply an appliance quirk.
Tools and supplies you will need
To see how to clean a dryer vent efficiently, gather everything before moving the appliance. The job is easier when the dryer remains disconnected for the shortest practical time.
- A dryer-vent brush kit with flexible extension rods
- A vacuum with a hose and crevice attachment
- A screwdriver or nut driver that fits the vent clamp
- Work gloves and a dust mask
- A flashlight
- A soft brush for the lint-screen housing
- Foil HVAC tape for an approved metal-duct seam, if needed
- A helper if the appliance is heavy or installed in a tight space
Avoid sharp tools that can puncture the duct. Do not use ordinary cloth-backed “duct tape” inside or around a hot exhaust connection; it can dry out and fail. If a connector is crushed, torn, or made from an unsuitable material, replace it with the type permitted by the dryer manufacturer and local code.
How to clean a dryer vent safely in 8 steps
1. Turn off and disconnect the dryer
Finish the current load, turn the appliance off, and unplug an electric dryer. If you have a gas dryer, do not disconnect or reposition the gas connection unless you are qualified to do so. If the appliance cannot move without stressing the gas line, stop and call a professional.
Never work behind a powered appliance. The drum may not be turning, but electrical components can still be energized.
2. Pull the dryer away from the wall carefully
Move the dryer straight out just far enough to reach the duct. Protect the floor with a thin sheet of hardboard if necessary. Ask for help rather than twisting or tipping a heavy machine.
Watch the connector as the dryer moves. A short flexible section can crush or tear if it is pulled sideways. If the power cord or gas line becomes tight, stop immediately.
3. Disconnect and inspect the exhaust duct
Loosen the clamp at the dryer outlet and gently remove the connector. Some installations also allow the connector to be detached at the wall. Photograph the arrangement first if that will help you reinstall it correctly.
Inspect the duct for tears, burned areas, corrosion, screws protruding into the airflow, and flattened sections. A badly crushed connector should be replaced instead of reshaped repeatedly because hidden splits can leak lint.
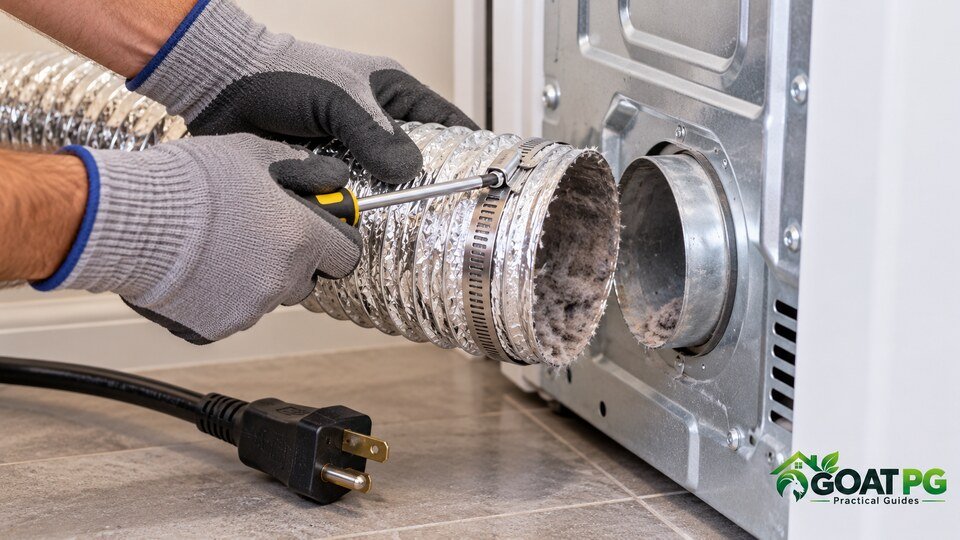
4. Vacuum the dryer outlet and lint-screen cavity
Use the crevice tool to remove loose lint from the dryer outlet without forcing the hose deep into internal parts. Then remove the lint screen and vacuum its housing with a narrow attachment or a purpose-made soft brush.
Be gentle around sensors and screens. If an object has fallen deep inside the appliance, consult the manual or a technician rather than disassembling the dryer without the correct procedure.
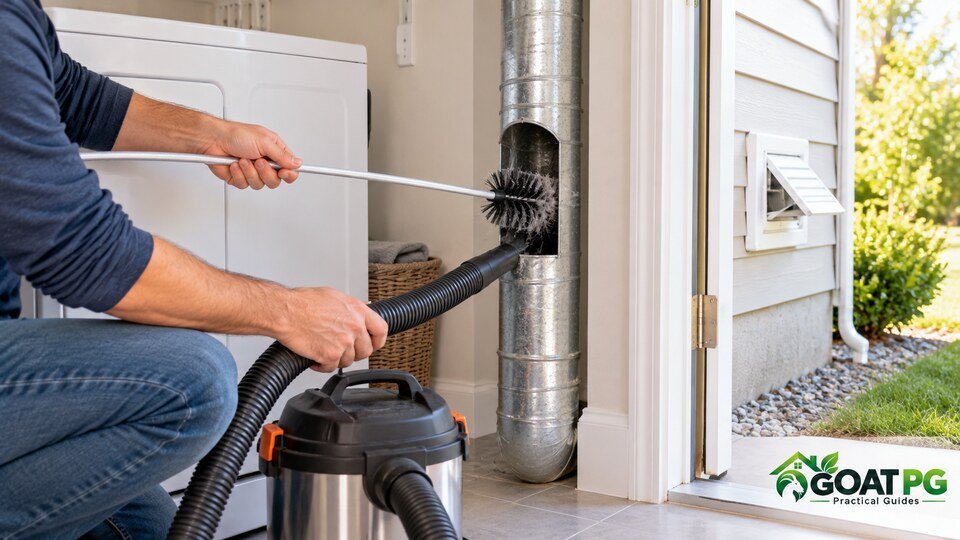
5. Brush the vent duct in short sections
Insert the flexible dryer-vent brush into the wall duct and rotate it in the direction recommended by the kit maker. Add extension rods one at a time. Work gradually, pulling the brush back periodically so loosened lint can be vacuumed away.
Do not reverse a drill while flexible rods are inside the duct; threaded sections may separate. Stop if the brush catches firmly. Aggressive force can disconnect hidden duct joints or puncture thin material.
6. Clean and test the outside vent hood
Go outside and remove lint, leaves, nests, or other debris from the vent hood. The flap should move freely and close when the dryer is off. Do not install a screen over the outlet because lint can collect on it rapidly.
If the outlet is on a high wall or roof, do not use an unstable ladder. That section is better handled by a qualified vent-cleaning service with safe access equipment.
7. Reconnect the duct without crushing it
Reattach the connector and tighten the clamp so it is secure but not deformed. Keep the path as short and straight as the installation allows. Avoid sharp turns behind the dryer and confirm the duct does not collapse when the machine is moved back.
Use only an approved metal transition duct. Plastic or thin foil accordion-style ducts can sag, crush, and trap lint more easily; follow the appliance manual and applicable local requirements.
8. Restore power and check airflow
Plug the dryer in, run it on an air-only or low-heat setting, and inspect the connection for movement or air leakage. Then check the outdoor hood. The flap should open fully and the airflow should feel steady.
Stop the test if you hear scraping, smell burning, see the connector shift, or notice weak airflow after cleaning. Those signs can point to a hidden blockage, damaged duct, or appliance problem that needs professional diagnosis.
Common dryer-vent cleaning mistakes to avoid
Cleaning only the lint screen
Understanding how to clean a dryer vent also means going beyond the lint screen. The screen needs attention after every load, but it is not the whole exhaust system. Fine fibers still reach the duct and exterior hood. ENERGY STAR advises cleaning the lint filter after every load to improve air circulation and efficiency, while periodic duct cleaning addresses buildup farther downstream.
Pushing lint deeper into the duct
A short brush used without a vacuum can pack debris into a bend. Work in controlled sections and remove loosened lint as you go. If the duct is long, concealed, or has multiple elbows, professional negative-air equipment may be more appropriate.
Using a leaf blower as a shortcut
A leaf blower can separate joints, spread lint indoors, or compact a blockage at a bend. It also gives no clear view of duct condition. A vent brush and vacuum provide more control.
Running the dryer with the duct disconnected
Do not vent a dryer into the laundry room. The exhaust carries moisture and lint, and a gas dryer can also create a serious combustion-gas hazard. The dryer must exhaust outdoors through a sound, correctly installed duct.
Ignoring the manufacturer’s instructions
Dryer designs differ. Check the manual for vent length, approved duct type, clearances, and service limitations. A heat-pump or ventless dryer follows a different maintenance routine and does not use a conventional outdoor exhaust duct.
When should you call a professional?
If you are unsure how to clean a dryer vent in your installation, pause and assess access first. DIY cleaning works best for a short, accessible duct in good condition. Arrange professional service when:
- The vent travels through a roof, attic, crawlspace, or several floors.
- You cannot reach the exterior outlet safely.
- Airflow remains weak after the accessible sections are clean.
- The duct repeatedly clogs or contains standing water.
- You find a disconnected, crushed, corroded, or improperly routed duct.
- A gas line must be moved.
- You smell burning, gas, or electrical insulation.
- The dryer overheats or shuts down after the vent has been cleared.
Turn off the appliance and leave it off if there is smoke, a burning odor, visible arcing, or a suspected gas leak. Move everyone to safety and contact the appropriate emergency service if there is an immediate hazard.
How to keep your dryer vent cleaner longer
- Clean the lint filter every load. This is the simplest way to keep fibers out of the duct.
- Wash a coated lint screen. Dryer-sheet residue can form a nearly invisible film. If water pools on the screen, gently wash it with warm water and a soft brush, then dry it completely.
- Avoid overloading the drum. Clothes need space to tumble and release moisture efficiently.
- Keep the area around the dryer clean. Vacuum lint beneath and behind the machine during routine maintenance.
- Inspect the outdoor hood. Keep vegetation, leaves, snow, and pest nests away from the opening.
- Use the shortest practical duct route. Long runs and repeated bends create more places for lint to settle.
- Record the cleaning date. Add a yearly reminder and shorten the interval if buildup is heavy.
The U.S. Consumer Product Safety Commission recommends making sure the exhaust pipe is unrestricted, confirming that the outside flap opens during operation, and cleaning lint from the vent pipe at least annually.
After learning how to clean a dryer vent, keep the improvement with good laundry habits that protect the machine and fabrics. If odors persist even after airflow is restored, see our guides to washing-machine odors and clothes that smell sour after washing.
Frequently asked questions
Can I clean a dryer vent myself?
Yes, if the duct is short, accessible, and in good condition. Learning how to clean a dryer vent starts with disconnecting power; use a dryer-vent brush and vacuum, and avoid forcing tools around hidden bends. Hire a professional for roof outlets, long concealed runs, gas-line complications, or persistent blockages.
How do I know the vent is completely clean?
After reassembly, the exterior flap should open freely and release a strong, steady stream of air. Drying time should return to normal. Weak flow after cleaning suggests a remaining blockage, damaged duct, excessive duct length, or an appliance fault.
How often should a dryer vent be professionally cleaned?
Once a year is a reasonable baseline for many vented dryers, but there is no universal schedule. Large households, pets, long duct runs, and frequent bulky loads may require shorter intervals. Inspect sooner whenever performance changes.
Can a clogged dryer vent increase the electric bill?
Yes. Restricted airflow keeps moisture in the drum, so the dryer may run longer or require another cycle. Restoring airflow can improve drying efficiency, although worn heating components, sensors, and overloaded loads can also cause long cycles.
Why is there water in my dryer vent?
Moisture can condense inside a cold, long, poorly insulated, or restricted duct. Check for a clog, sagging sections, and improper routing. Persistent water needs professional inspection because repeated condensation can corrode metal and encourage buildup.
Should the outside dryer vent have a screen?
No. A mesh screen can trap lint and block airflow. Use a proper dryer-vent hood with a damper that opens freely when the dryer runs and closes when it stops.
Final takeaway
Knowing how to clean a dryer vent is a straightforward piece of preventive maintenance when the duct is accessible: disconnect power, clean the dryer outlet, brush and vacuum the duct, clear the exterior hood, reconnect everything without crushing it, and verify strong airflow.
Make lint-screen cleaning part of every laundry load and schedule a full vent inspection at least yearly. If the vent is inaccessible, damaged, or still restricted after cleaning, bring in a qualified professional rather than forcing the job.