
Summary
How to Enable Energy Saver Mode on Windows 11
Energy Saver mode is a power-saving feature in Windows 11 designed to reduce energy consumption and extend battery life. It works by limiting background activity, reducing visual effects, and slightly lowering system performance to save power.
In this guide, you’ll learn how to enable Energy Saver mode on Windows 11 step by step.
What Is Energy Saver Mode in Windows 11?
Energy Saver mode helps:
- Extend laptop battery life
- Reduce electricity usage on desktops
- Lower background system activity
- Minimize animations and visual effects
Unlike the traditional Battery Saver, Energy Saver can also work on desktop PCs.
How to Enable Energy Saver Mode on Windows 11
Before starting, make sure your Windows 11 system is up to date.
Steps:
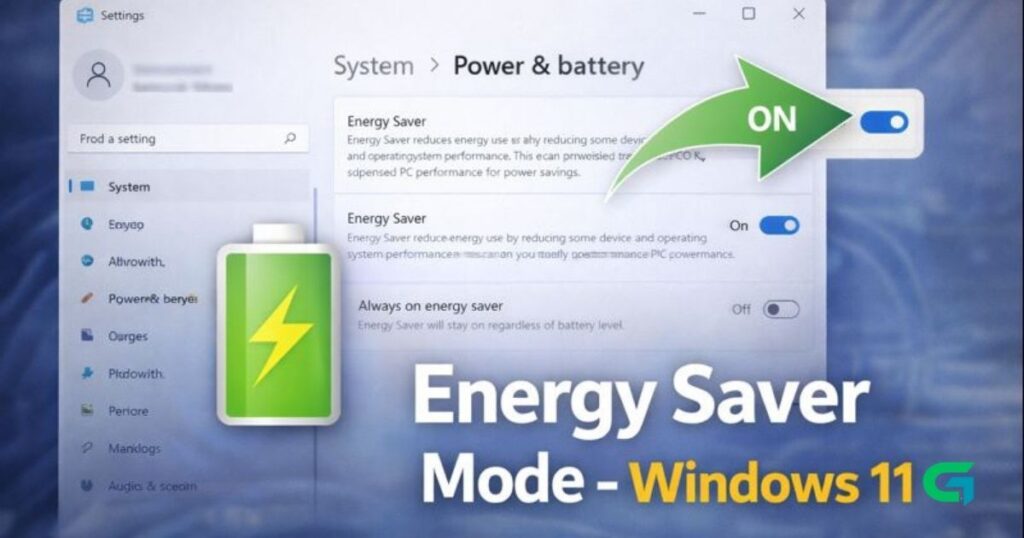
- Click the Start button and open Settings.
- Go to System.
- Click Power & Battery.
- Scroll down and expand Energy Saver.
- Toggle ON Energy Saver or choose to run it automatically.
Enable “Always On” Energy Saver (Optional)
If you want Energy Saver enabled at all times:
- Open Energy Saver settings.
- Enable Always on Energy Saver.
This option keeps Energy Saver active regardless of battery percentage.
How to Disable Energy Saver Mode
If you no longer want to use Energy Saver:
- Go back to Settings → System → Power & Battery
- Toggle OFF Energy Saver
Changes apply instantly.
Energy Saver vs Battery Saver
Although they sound similar:
- Battery Saver focuses mainly on laptops
- Energy Saver works on both laptops and desktops
- Energy Saver is designed for long-term power efficiency
Read Also : How to Cut Videos Using VLC Media Player in Windows
Final Thoughts
Energy Saver mode is a useful feature for users who want to conserve power and extend battery life on Windows 11 devices. Whether you’re using a laptop or desktop PC, enabling this feature can help reduce energy consumption with minimal impact on daily tasks.
For more Windows optimization guides, visit GOATPG.